4 min bacaan
I’ve been spending a lot of time lately moving my stacks over to Dokploy, and while the platform is fantastic, I hit a bit of a wall when trying to mount specific configuration files in a Compose service. It wasn’t immediately obvious where those files actually live on the host, so after some trial and error, I wanted to document the fix here for anyone else running into the same issue.
When working with Dokploy, the “Compose” service type offers immense flexibility by allowing you to define your stack via a docker-compose.yml file. However, a common point of confusion arises when you need to mount a specific configuration file (like a .ini, .json, or .conf) using Dokploy’s built-in Advanced Settings -> Mount Volume feature.
It is important to note that for Compose type services, only the FILE mount type is supported. In this guide, we will explore the mechanics of how Dokploy stores these files and how to correctly reference them in your Docker Compose configuration to ensure your settings are persistent and secure.
The Challenge: Where is the Mounted File?
In a standard Dokploy “Application,” file mounts are handled automatically by the platform’s internal logic. But in a Compose service, Dokploy doesn’t manage the container creation directly—it follows the instructions you define in your YAML file.
If you go to your service’s Advanced tab and create a mount with the type FILE, Dokploy saves that content on the host system. Since the compose type doesn’t directly create an app, you need to know exactly where Dokploy stores these files to reference them correctly in your volume mapping.
The Secret Ingredient: ../files/
Dokploy organizes its internal storage for Compose services using a specific directory structure on the host:
- Code Directory:
/etc/dokploy/compose/[service-id]/code(Where yourdocker-compose.ymlis stored). - Files Directory:
/etc/dokploy/compose/[service-id]/files(Where the file mounts set in the dashboard are stored).
Because the docker-compose command is executed within the code directory, you must step up one level (..) to access your mounted files. This is the key to a successful Dokploy volume mount.
Implementation Example: PHP and OpenClaw
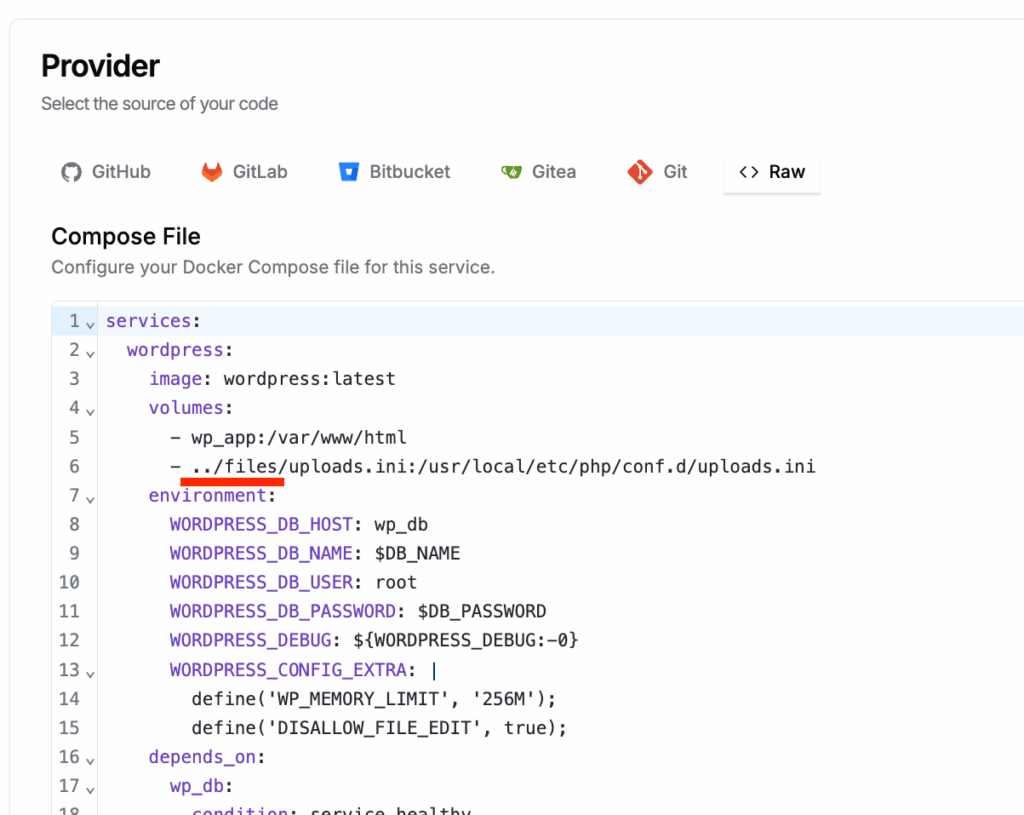
Suppose you want to mount a custom uploads.ini for a PHP service or a configuration file for OpenClaw (using the coollabsio/openclaw:2026.3.23 image).
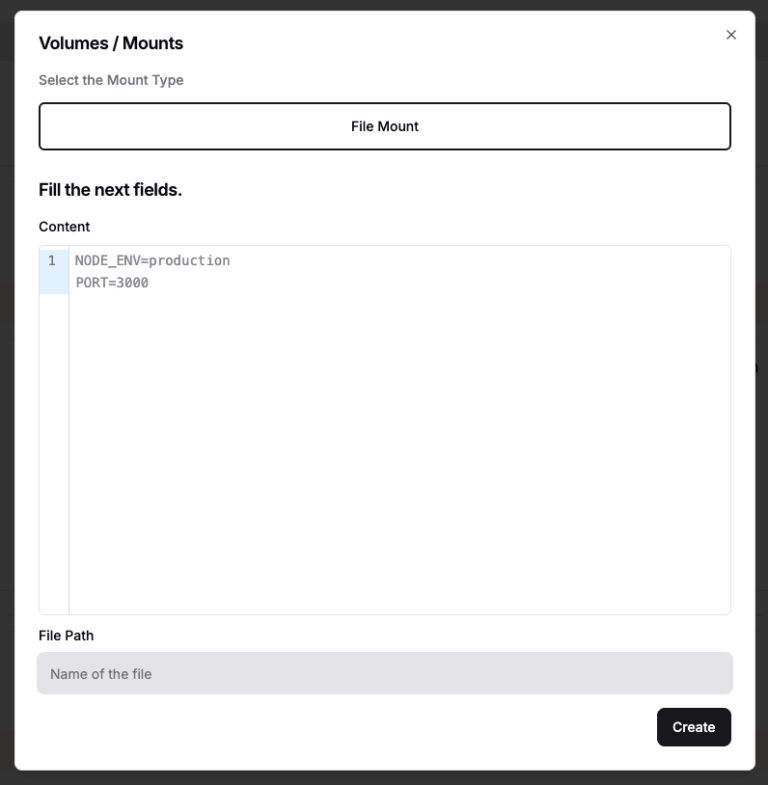
- In Dokploy Dashboard: Navigate to your Compose service -> Advanced -> Mounts.
- Create Mount:
- Type: FILE
- Name:
uploads.ini(oropenclaw.json) - Content: Paste your configuration settings here.
- In your
docker-compose.yml:
services:
  app:
    image: coollabsio/openclaw:2026.3.23
    volumes:
      # Use the ../files/ prefix to reach the Dokploy-managed file
      - ../files/openclaw.json:/data/.openclaw/openclaw.json:ro
Why Use :ro (Read-Only)?
It is highly recommended to append :ro to your volume definition for security and data integrity. Marking a mount as read-only ensures that your application doesn’t accidentally overwrite configuration files that should be managed via the Dokploy dashboard.
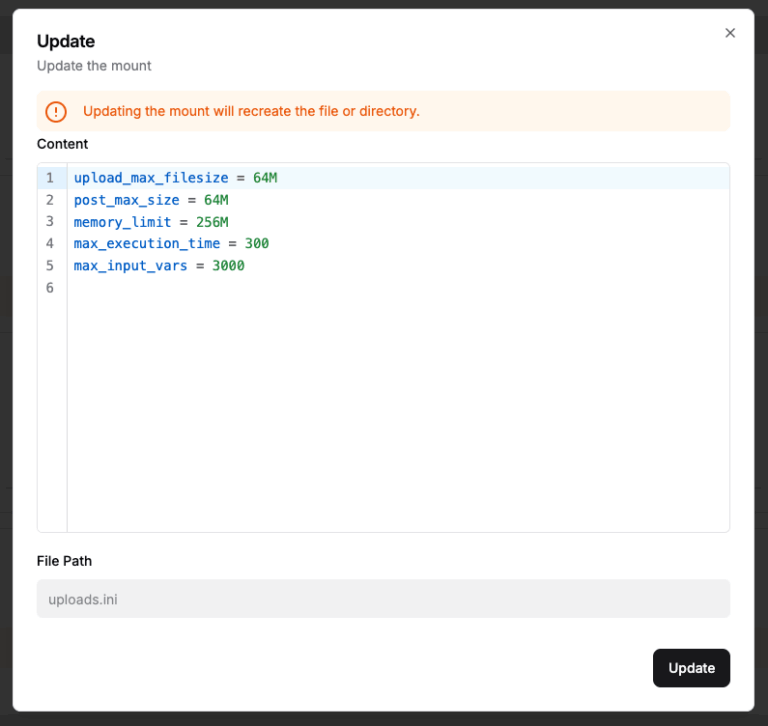
In my testing, updating a file via the Dokploy dashboard reflects immediately on the host system. However, if your application modifies the file from within the container, those changes will not sync back to the dashboard UI. To prevent this “Source of Truth” conflict, always use :ro.
Important Note on Caching
While the file updates on the disk immediately upon saving in Dokploy, your application might not see the changes if it caches configuration at startup. If you update a file like openclaw.json, you may need to restart the service to ensure the new content is reflected in the running process.
Summary Checklist
- Define the file in the Advanced tab of Dokploy.
- Reference the file in your YAML using the
../files/prefix. - Use
:roto keep configuration management centralized and secure.
Related Reading: Looking for the absolute fastest way to host your site? Check out my guide on Unleashing WordPress Performance on Dokploy with OpenLiteSpeed.
Leave a Reply
You must be logged in to post a comment.